Warning
This documentation is actively being developed and links may change.
Android Module
This guide assumes you've already read and followed Fuse JS Module. If not, we strongly recommend beginning there first before proceeding.
A Fuse android module is an Android implementation of a plugin. They serve the purpose of handling requests by the webview via the API server and doing an action on behalf of the webview.

Before we dive into creating an Android project we will discuss a few Fuse topics.
A FuseContext is a state holding object that holds a reference to all FusePlugin instances as well as the FuseAPIServer and FuseAPIRouter. When the webview makes a request to the API server, the message will be routed to the appropriate FusePlugin via FuseAPIRouter.
The plugin may have 0 to many APIHandler's attached to respond to these requests. If invoked, it is then the responsibility of the APIHandler to use the given FuseAPIResponse object to respond to the request.
Note
Requests has no timeouts, but a request should be responded in a timely manner as the webview will limit active requests to about 6 concurrent requests. If this limit is reached, the browser will start but block requests until an active request has been closed.
Creating the Android project.
Following along the Getting Started guide, you should already have a android directory. If not, then create one now.
Open up Android Studio and create a new Empty Views Activity Android Project.
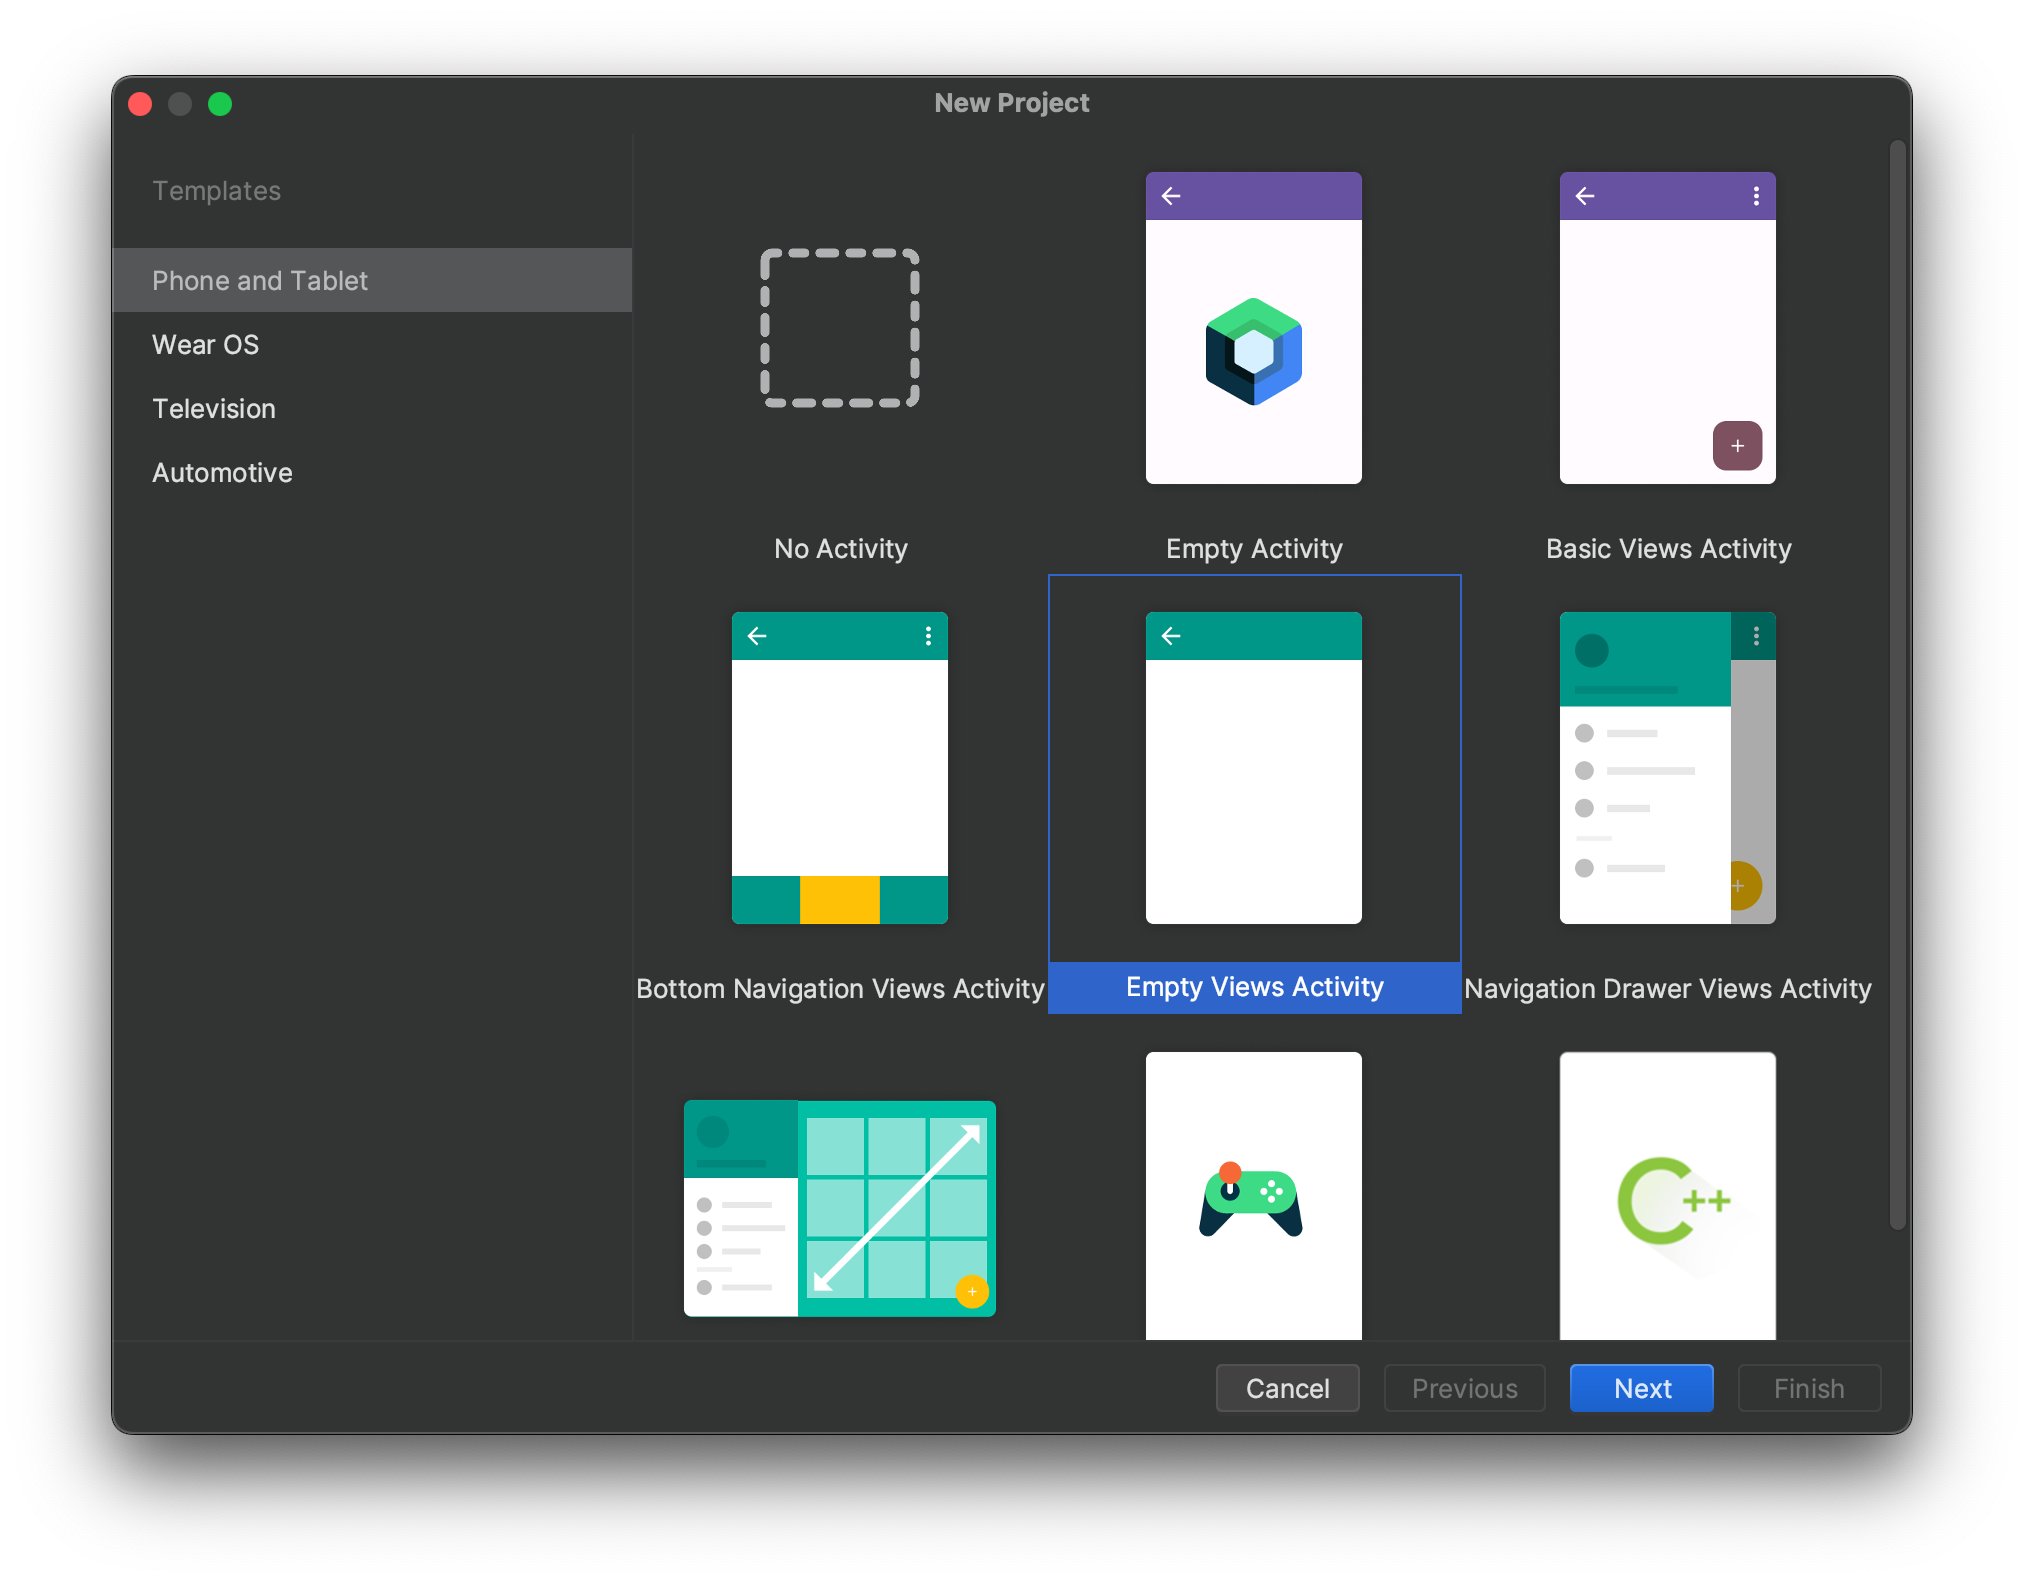
Choose an acceptable name and package. Make sure to set the Save Location to the android/ directory.
This guide will use Java, but feel free to use Kotlin if you're experienced.
Currently the Fuse framework uses a Minimum SDK of 24, therefore it's best that your plugin matches. However it is valid to choose a higher minimum SDK if necessary.
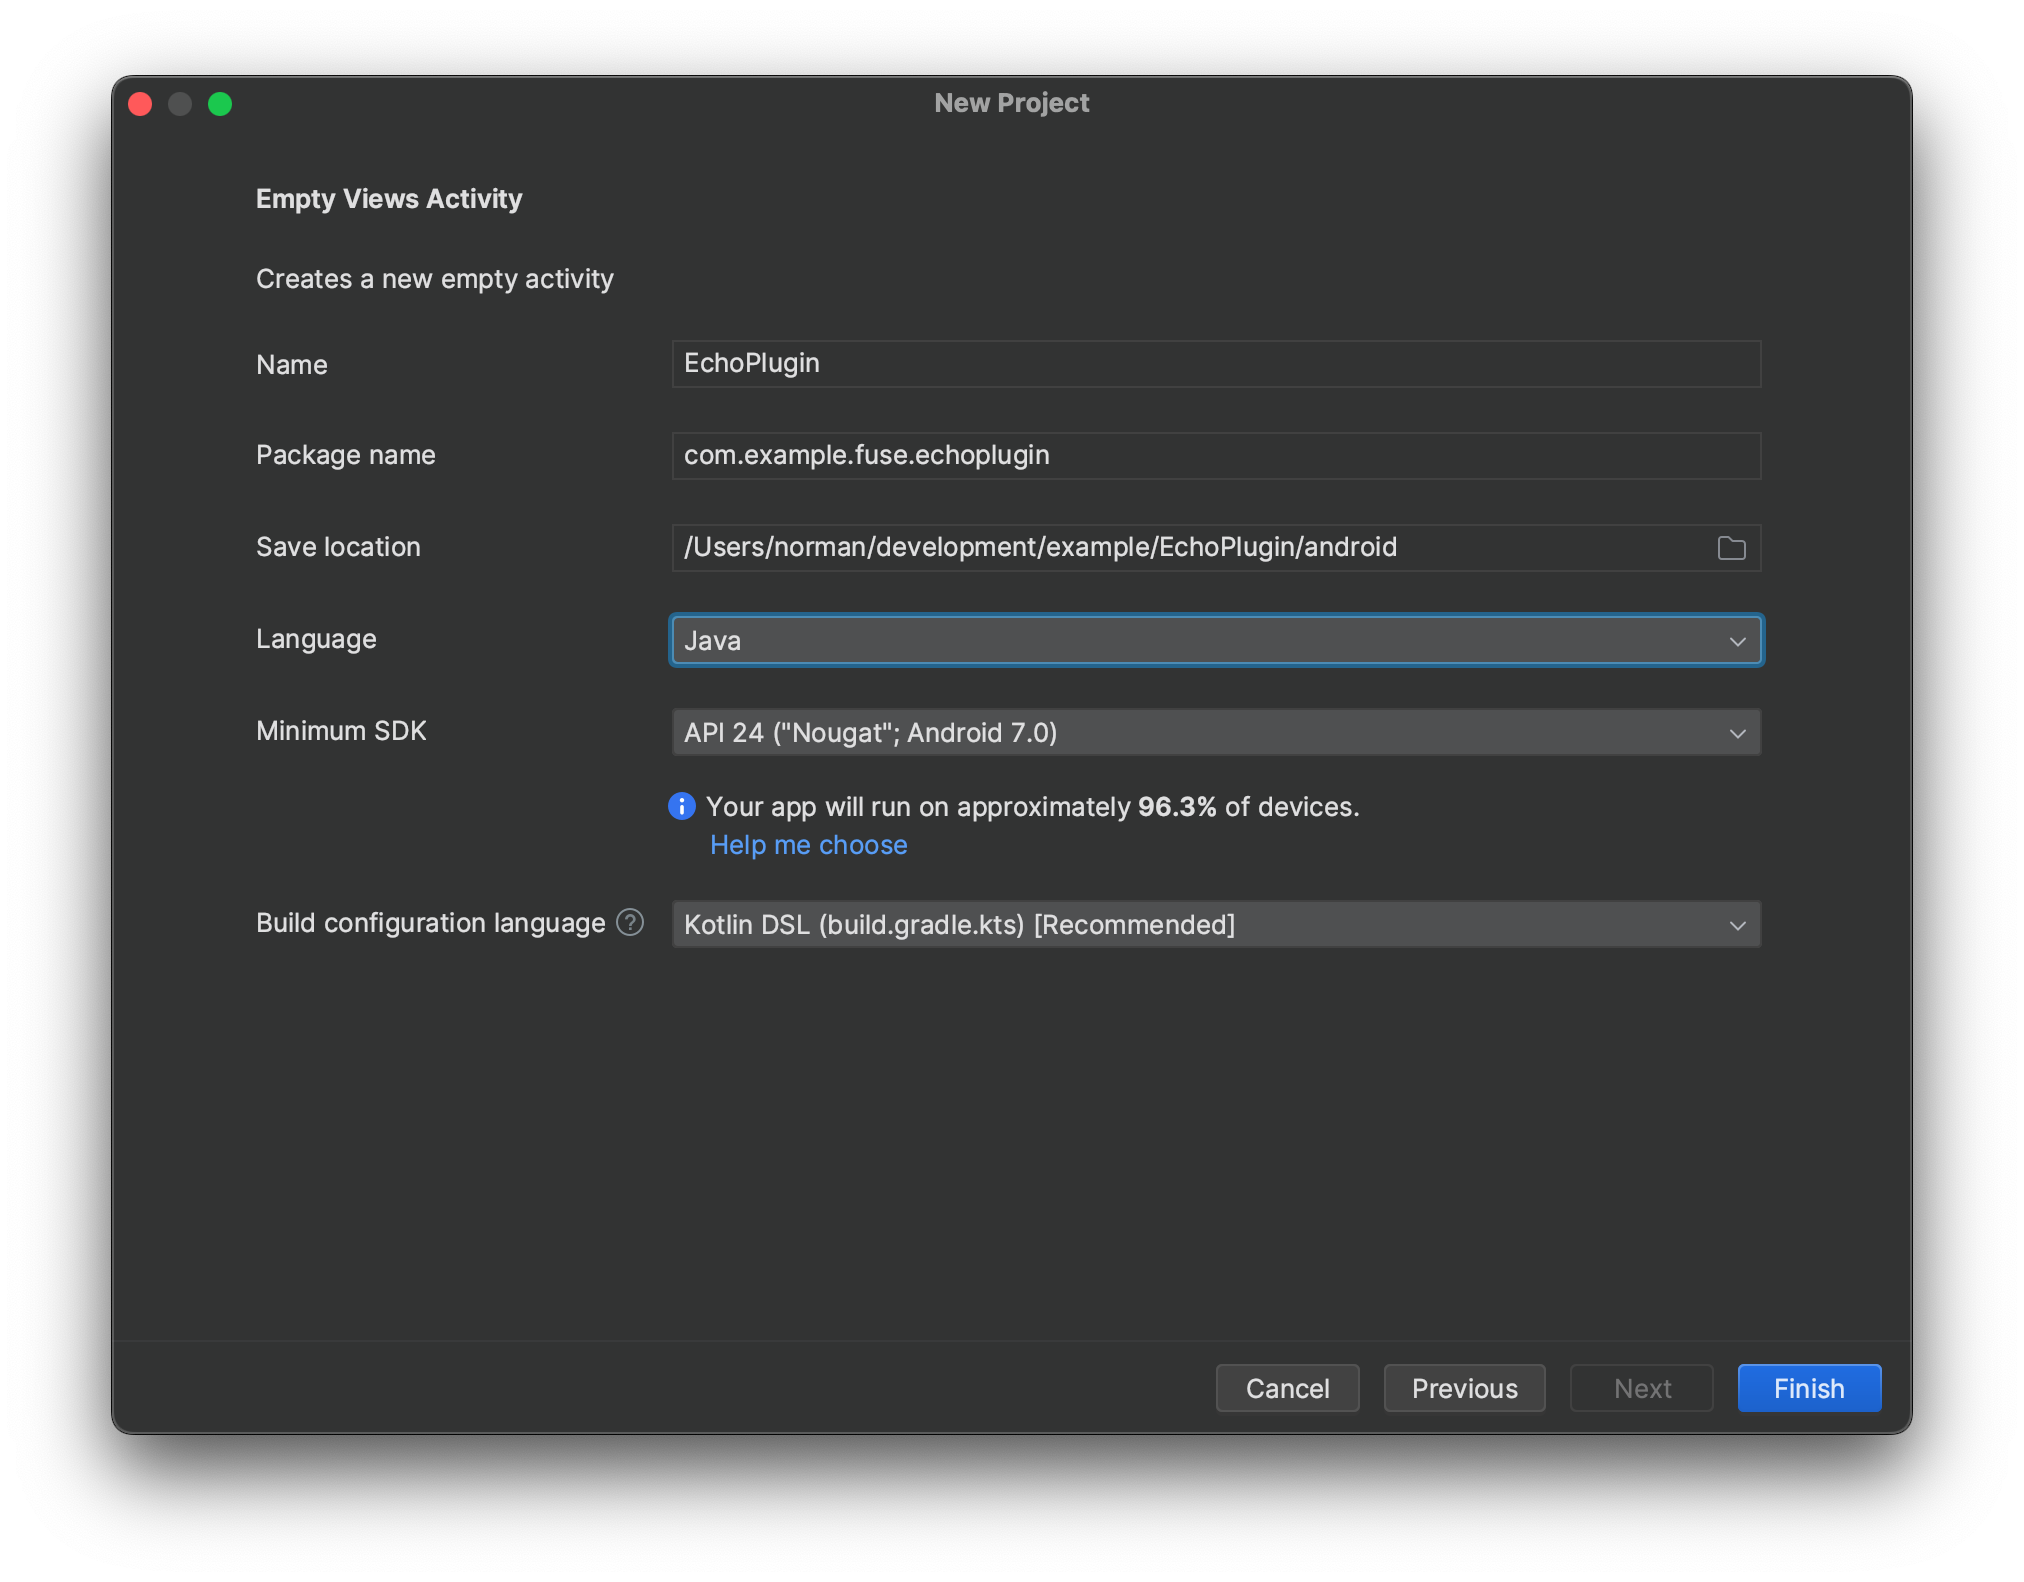
Click Finish and let Android Studio do it's thing syncing with Gradle and such.
This will provide you a new project with a single app module, which can serve as your test application.
Once Android Studio is synced with Gradle, we'll need to create a new Android Library Module, which for your plugin.
Right click the Project Navigator and click New -> Module.
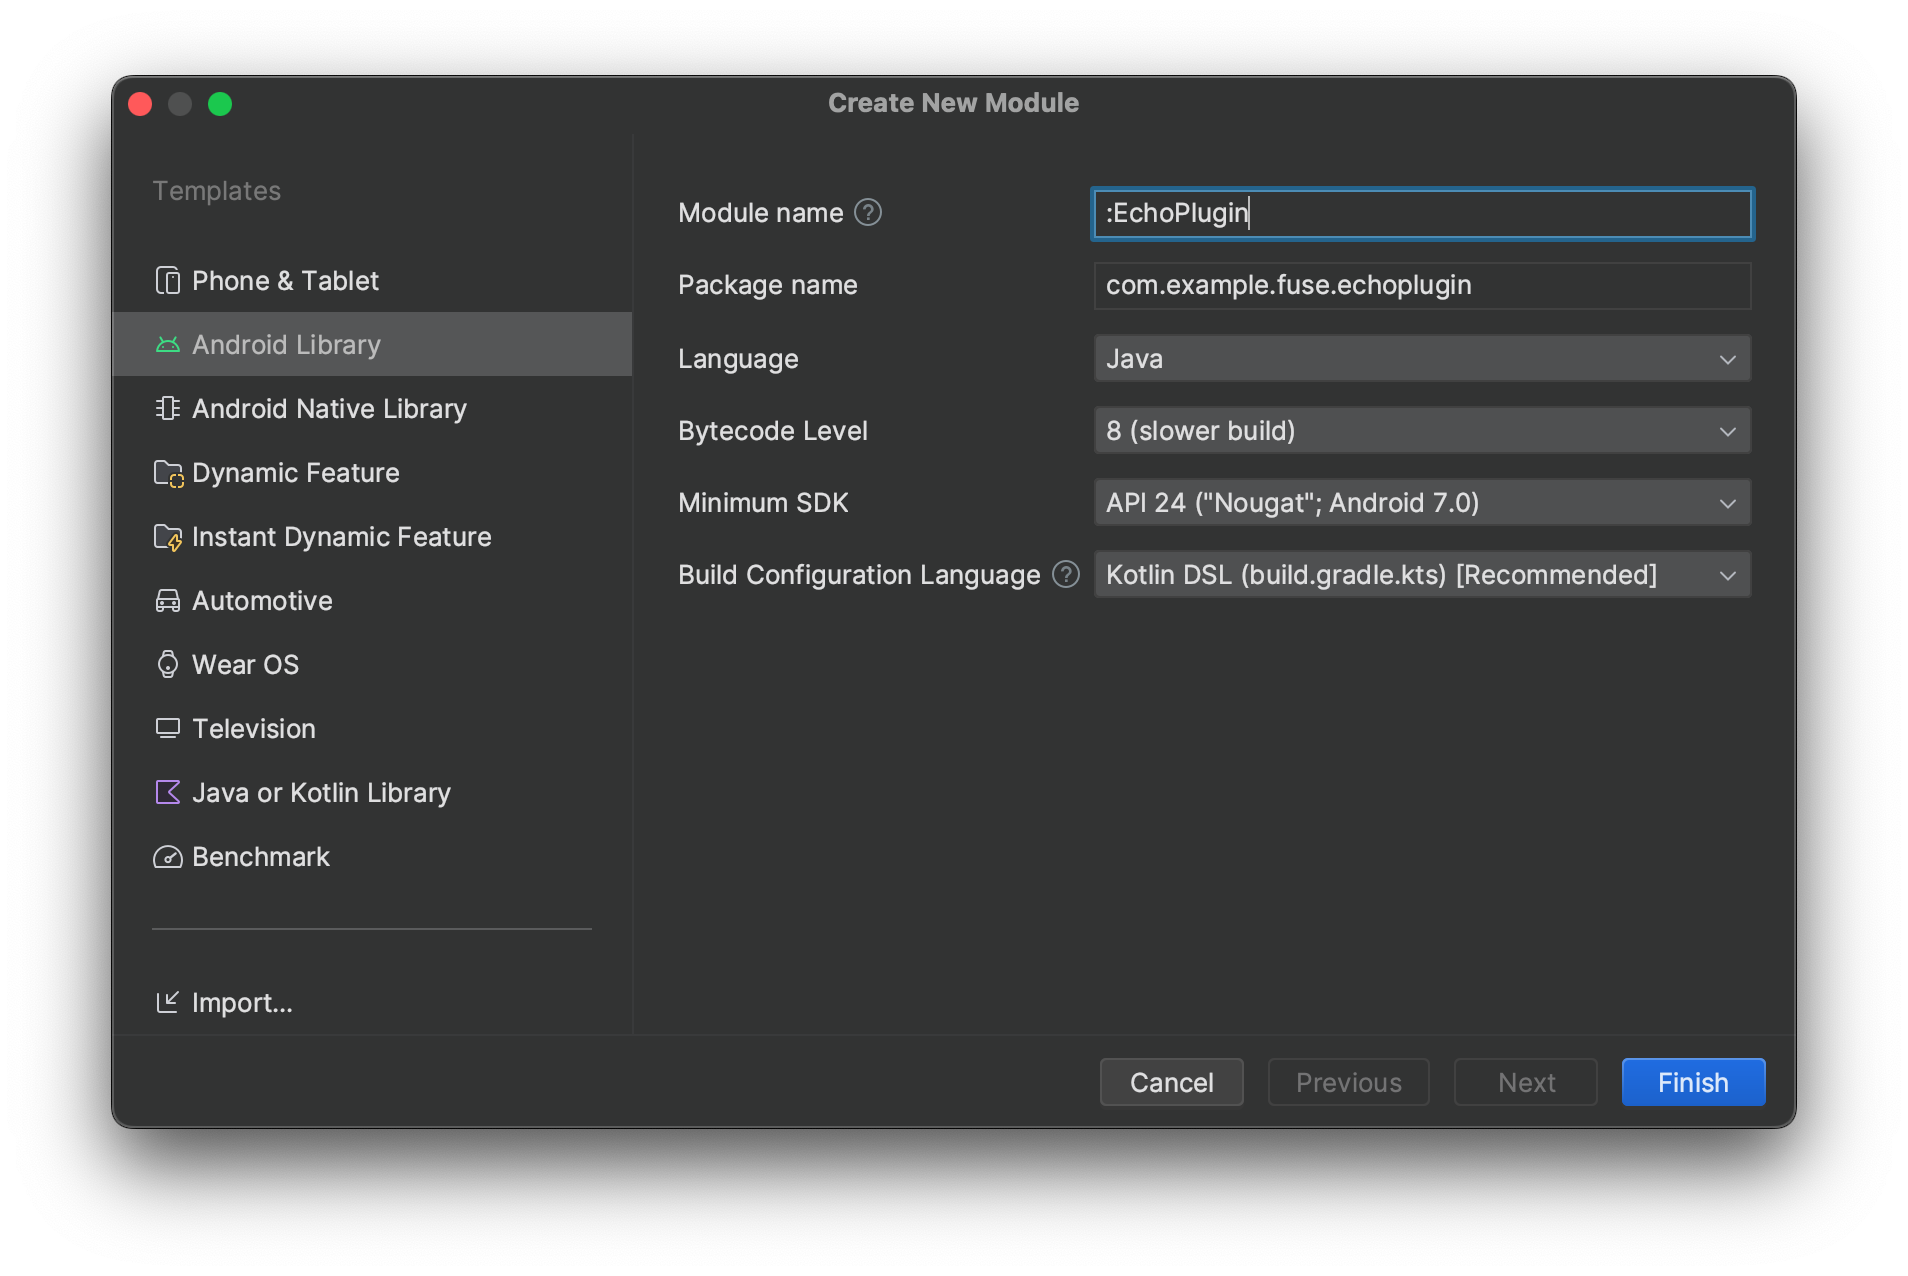
This is personal preference but I like to keep the app module and the library module separate, so when supplying the Module name remove the :app prefix. This will make Android Studio place the module at the root level.
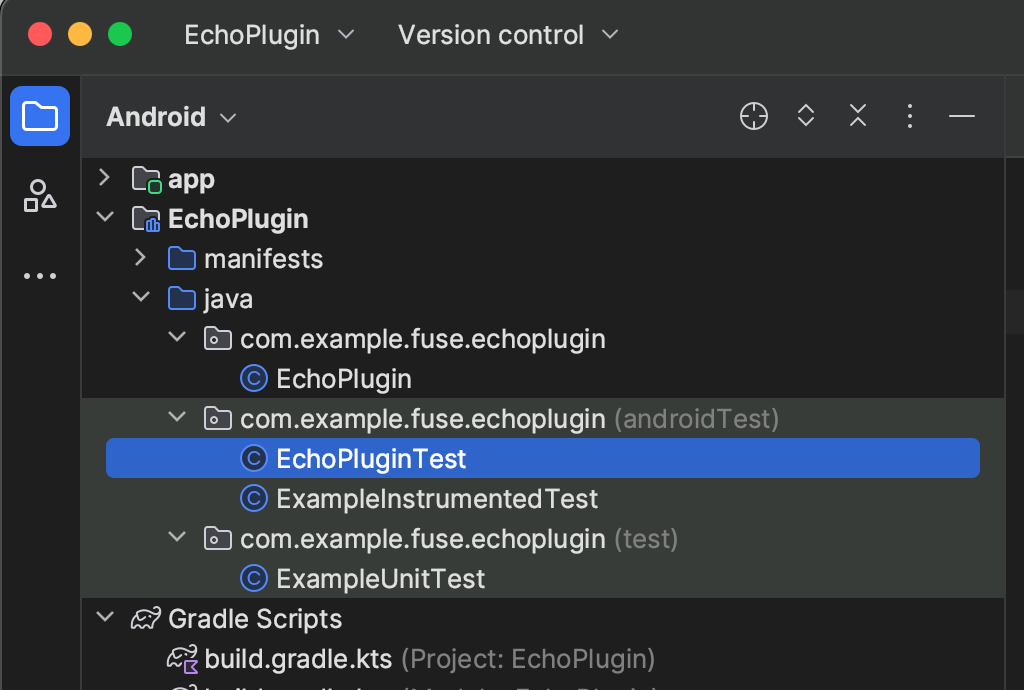
Your project window should look something like:
Adding the Fuse dependency
The Fuse framework can be synced via maven and is available via https://archiva.breautek.com
First we'll need to add this maven repo. Edit the settings.gradle.kts file.
Inside the dependencyResolutionManagement.repositories block add:
The full file should now look like:
This will allow us to pull and add fuse dependencies to our modules.
Let's open EchoPlugin's build.gradle.kts and add our dependency now.
Inside the dependencies block add:
Tip
Check out Breautek's Archiva for the latest available version.
Note
We are using compileOnly because we only need the artefact to compile and test. It is the application's responsibility to provide the framework via a implementation dependency.
Note
We can (and should) use an exact version pin, because unlike NodeJS modules Android doesn't have a true concept of peer dependencies but using compileOnly / implementation acheives a similar effect. However, it does not enforce a particular version range on the application.
The full dependency blocks will look something like:
dependencies {
    compileOnly("com.breautek.fuse:core:0.7.1")
    implementation("androidx.appcompat:appcompat:1.6.1")
    implementation("com.google.android.material:material:1.10.0")
    testImplementation("junit:junit:4.13.2")
    androidTestImplementation("androidx.test.ext:junit:1.1.5")
    androidTestImplementation("androidx.test.espresso:espresso-core:3.5.1")
}
Implementing the EchoPlugin
Now we are ready to write some code. Let's create a new class EchoPlugin:
Let's break down what we've just done.
constructor
All plugins must have a constructor that accepts a FuseContext. Additional setup code can also be done here.
getID
This is an abstract method and it should return a constant string and it should match the chosen id as the JS module's FusePlugin implementation. This identifier is used to map to your plugin. It must be unique and is the glue that ties your native plugin to the JS module.
For more information see the Getting Started Plugin Identifiers section.
_initHandles
This is also an abstract method, it gets invoked during plugin construction. This is where a plugin should attach all handlers. In the sample code above, inline APIHandler were created and used, but they could also be abstracted into their own codebase. APIHandler does have a reference to the FusePlugin instance via this.plugin.
A FusePlugin may have several APIHandler's attached, as long as the endpoint string is unique. The endpoint string always starts with a forward slash / character and it corresponds to the JS module's this._exec method usage.
Note
While the API gateway is a HTTP server, URL hash fragments and query strings are not supported at this time.
When an APIHandler's execute method is invoked, it will be given a FuseAPIPacket and a FuseAPIResponse object used to read data and write data back out. The API server operates in a binary fashion, but provides utilities to read the data as JSON, string, or other formats. Additionally, the raw input stream can be obtained if fine control is required, particularly if working with large datasets.
Warning
When using the input stream directly, do not attempt to read more bytes than what FuseAPIPacket.getContentLength() returns. Doing so will cause a thread block awaiting for more data to be received, which will never occur.
The APIHandler.execute method is always invoked on a background thread. This is the thread ideal for using the InputStream or any of the FuseAPIPacket read APIs.
Note
FuseAPIPacket is not thread-safe. Additionally it must not be used on the main thread, as Android OS forbids networking/socket use on the main thread.
FuseAPIPacket
In the sample code we use readAsBinary and pass it back to FuseAPIResponse as an "echo".
The following read APIs is also available:
| Method | Return Type | Description |
|---|---|---|
readAsString |
String |
Reads the content body as a String |
readAsBinary |
byte[] |
Reads the content body as a byte array |
readAsJSONObject |
JSONObject |
Reads the content body as a JSON object |
readAsJSONArray |
JSONArray |
Reads the content body as a JSON array |
getInputStream |
InputStream |
Gets the underlying input stream |
Warning
It's unsafe to use the underlying InputStream if any of the read APIs is also used, as they will consume the bytes of the input stream.
Additionally, the packet object also has getContentLength() and getContentType() APIs to know the "kind" of data and the size, as given by the JS module.
FuseAPIResponse
The FuseAPIResponse object is used to provide a response back to the HTTP request.
Unlike the standard browser, there is no network timeout, but there is a concurrency limit on HTTP connections. Therefore the plugin should respond back as quickly as possible.
Unlike FuseAPIPacket, the FuseAPIResponse is thread-safe. If you call on any of the APIs, it will ensure to use it's own dedicated networking thread. However, using the FuseAPIResponse should still be done on a single thread, to ensure data is written in the proper order.
Most of the time, FuseAPIResponse will be used to send a small data packet response back to the webview and the API has several convenience methods to do this quickly. However we will take a moment to go through the low-level API so that we can understand what is going on behind the scenes.
The API protocol uses HTTP, so the first thing required is setting and sending the headers. This must be done before any data is sent. To acheive this, set the status, content type, and content length, and then call didFinishHeaders().
response.setStatus(FuseAPIResponseStatus.OK);
response.setContentType("text/plain");
response.setContentLength(6); // "Hello!"
response.didFinishHeaders();
Alternatively, we can also do this via sendHeaders:
Once didFinishHeaders() is called, headers cannot be changed, but data can now be pushed via pushData, which accepts a byte[].
pushData can be invoked as many times as needed, which is useful for chunking data such as reading from a data stream. Once you're finished writing data, use didFinish to signal that you're done.
Once didFinish is called, the request is completed and using and the connection will be flushed and closed. Do not use the response object after didFinish has been invoked.
Note
Pushing data will write to the underlying network socket but data is not delivered to the client until the socket is closed. This is a limitation of browser clients and webviews. The Streams API should solve this issue, but this API is still rather fresh.
A full example may look like this:
response.setStatus(FuseAPIResponseStatus.OK);
response.setContentType("text/plain");
response.setContentLength(6); // "Hello!"
response.didFinishHeaders();
response.pushData("Hello!".getBytes());
response.didFinish();
Warning
Writing more bytes than what is specified via setContentLength is undefined behaviour. Take care to write exactly the bytes specified. Do not write more or less than the specified bytes.
This is quite cumbersome and error prone if you forget a line or miscalculate the bytes required. While the low-level API is a good thing to be aware of, there are several convenience APIs that allows you to write strings and other data types. These handle sending the HTTP headers as well as the data writing.
| Method | Purpose |
|---|---|
send(byte[] data, String contentType) |
Sends binary data as the specified content type. |
send(byte[] data) |
Sends binary data as application/octet-stream. |
send(IFuseSerializable data, String contentType) |
Sends a serializable as the specified content type. |
send(IFuseSerializable data) |
Sends a serializable as application/octet-stream. |
send(JSONObject json) |
Sends a JSON object as application/json. |
send(JSONArray json) |
Sends a JSON array as application/json. |
send(String data) |
Sends text data as text/plain. |
send(FuseError error) |
Sends a serialized FuseError object as application/json. |
send() |
Sends a successful state with no data. |
sendInternalError() |
Sends a 500 status code. Use send(FuseError) to send a more useful error signal. |
kill() |
Abruptly and non-gracefully closes the connection. |
We can rewrite our above example with:
And this is a safe way of setting the status, content type, and content length, sending the headers, writing the "Hello!" data as binary byte content, and finally closing the connection.
Using continuous callbacks
The HTTP protocol allows for a very efficient data transfer of content including binary content but it does have some limitations. Any HTTP request must be responded to in a timely manner. The webview only allows a small limit of concurrent connections opened at a given time. Exceeding this limit will cause an HTTP connection be blocked until an active connection has been closed.
Therefore the HTTP protocol doesn't suite very well if the native API needs to do a long running task, or needs to continous call on the webview (e.g. to provide sensor updates).
For these use cases, it's best to setup a callback API. A callback API requires 3 things:
- A HTTP API to register a callback id.
- A HTTP API to unregister a callback id, for when the callback is no longer needed.
- Using a
FuseContextto dispatch messages back to the callback using the callback id.
The drawback of callback style APIs is that it uses the more traditional webview bridge, which only supports String data. Binary data should be base64 encoded, which is slow and will increase the memory consumption by about 33%.
But for a watch-style callback, these limitations are probably fine as the data packets can be sent as frequent but small data packets.
Let's add a new instance member, String callbackID on our EchoPlugin.
Let's add couple new APIHandlers to our EchoPlugin:
@Override
protected void _initHandles() {
    ...

    this.attachHandler("/registerCallback", new APIHandler<EchoPlugin>(this) {
        @Override
        public void execute(FuseAPIPacket packet, FuseAPIResponse response) throws IOException {
            this.plugin.callbackID = packet.readAsString();
            response.send();
        }
    });

    this.attachHandler("/unregisterCallback", new APIHandler<EchoPlugin>(this) {
        @Override
        public void execute(FuseAPIPacket packet, FuseAPIResponse response) throws IOException {
            this.plugin.callbackID = null;
            response.send();
        }
    });
}
Now we have a /registerCallback handler that reads a string and assigns callbackID to it, and a /unregisterCallback that sets the callbackID as null.
Let's add the last piece now, a periodic timer that uses the callback id if present.
import java.util.Timer;
import java.util.TimerTask;

public class EchoPlugin extends FusePlugin {
    public EchoPlugin(FuseContext context) {
        super(context);

        this.callbackID = null;

        EchoPlugin self = this;

        Timer timer = new Timer();
        TimerTask task = new TimerTask() {
            @Override
            public void run() {
                if (self.callbackID) {
                    long currentTimeMillis = System.currentTimeMillis();
                    self.getContext().execCallback(self.callbackID, currentTimeMillis.toString());
                }
            }
        };

        timer.scheduleAtFixedRate(task, 0, 1000);
    }
}
Now when /registerCallback is called with a callback ID, the callback will be invoked every second with the current system clock time in milliseconds.
Unit Testing
The Fuse framework promotes unit testing capabilites using the native unit testing suite. For android development, this means junit and android's instrumented unit test framework can be used.
Keen observers might have noticed that Android Studio has created a test and androidTest flavour of your modules, with example test code. The test flavour runs fast, but runs on your development's machine JVM, so android APIs aren't available. This makes sense if you're trying to test a particular class that doesn't use any device APIs directly and the test can be compiled and ran very fast.
Whereas androidTest is an instrumented test. That is the test code needs to be compiled and deployed to a simulator. This is slower and consumes more hardware resources, but tests will have access to device APIs.
This guide won't go into details on android unit testing, so if you want to learn more, I encourage the read of the android docs.
Let's get started.
Test Tools
Like the JS modules, Fuse offers some test tools that assists in testing in a Fuse environment and is available under the com.breautek.fuse:test-tools artefact.
The test tools library does require android APIs and thefore can only be used in instrumented tests.
In the dependencies block, add:
Tip
You can find the latest release here
And because our unit test will also use the core fuse framework, we need to also add:
Test Code
Inside the androidTest variant, create a new EchoPluginTest class:
And add the following code:
Inside the androidTest variant, create a new EchoTestActivity class:
So to recap what we've done, we have:
- Created a
EchoTestActivityto serve as our main activity that holds theFuseContextand ourEchoPlugininstance. - A
EchoPluginTestwhich contains our test cases, including one that demonstrates hitting the API endpoint and asserts the response code and response body content.
Running the unit tests
Now that we have all the configuration and unit test code in place, let's try running the test.
Test can be ran via gradle or directly inside Android Studio. Since we are already in Android Studio, let's get that setup. By default, Android Studio only has 1 Run Configuration configured, which is to run the app. What we need is a Run Configuration for our androidTest.
In the top-right corner, click on the Run Configuration menu and click Edit Configurations...:
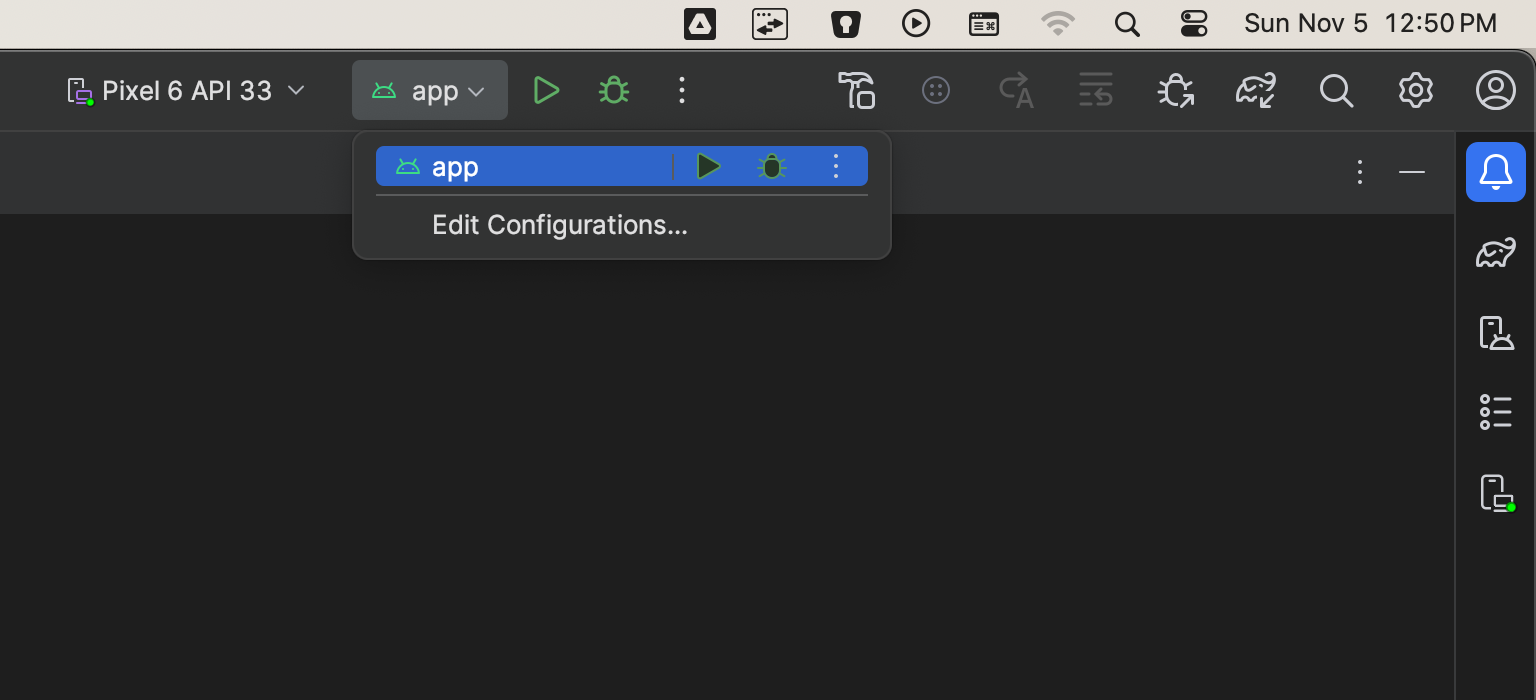
Then click on the + icon to add a new configuration and select Android Instrumented Tests.
Optionally you can give the configuration a new name. The default name is All Tests.
Select the EchoPlugin.EchoPlugin.androidTest module then click OK.
Now the Run Configuration will be set to All Tests. When you run this configuration, the unit tests will build and run against the selected device.
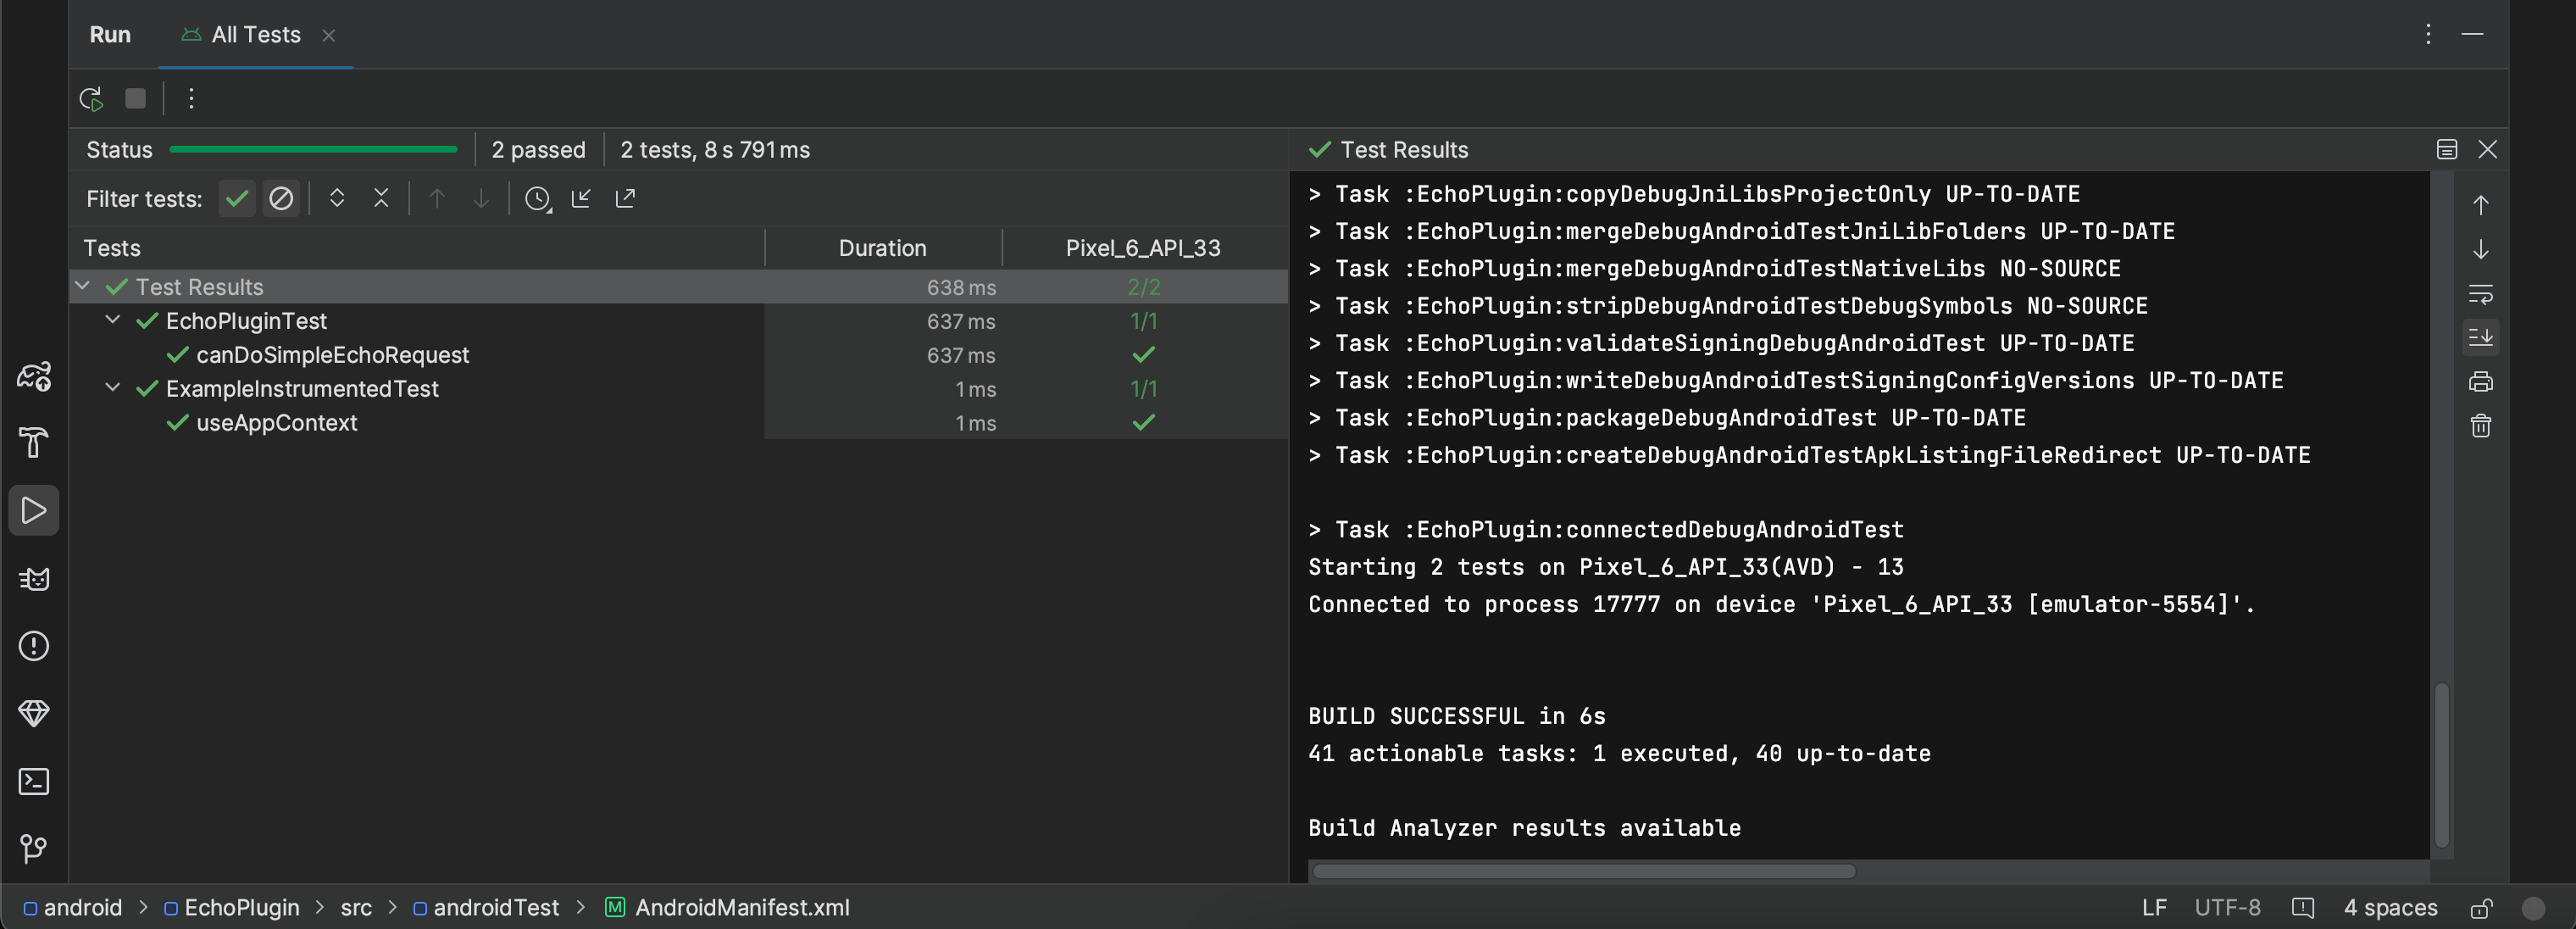
If your tests passes, conguratulations! You have successfully created an android module that is capable of listening and responding to API calls from the webview!
Alternatively you can run the tests via Gradle from command line:
Unix: ./gradlew connectedAndroidTest
Windows: ./gradlew.bat connectedAndroidTest
Creating a Test App
TBD
Meanwhile, most of User Guide applies.